Remixing
From Proteopedia
Remixing refers to assembling a document from multiple sources. For example, you might want to make a page about the citric acid, and want to incorporate 3D scenes from existing articles on the individual enzymes. First, search whether there is such an article already (there is, Citric Acid Cycle). If not, you can start a new page and remix as described below.
Contents |
Source attribution
Content written on Proteopedia is available with a CC-BY-3.0 licence, so you are welcome to reuse it here or elsewhere, but have to attribute the source. Within Proteopedia, the culture is to include a section called content donors, and list contributions from people other than yourself there. When remixing for a new page on Proteopedia, it makes sense to start with that section, and list the sources from which you are about to remix.
Remixing text
You can either copy and past text without formatting, or go into the edit tab and copy formatted text. Which method you use depends on how much of the original formatting is useful for the new text. If you do go into the edit tab, make sure you cancel out of it when you are done copying so you don't inadvertently change the source articles.
Remixing 3D scenes from outside sources
First, check what the licensing terms are and whether they are compatible with CC-BY-3.0, the license on user-created Proteopedia content. If you have permission or received permission from the author, obtain the state script (go into the Jmol console and press the State button), and figure out which coordinates the scene is based on. In the SAT on your new page, run the state script by pasting it into the Jmol console, and save the scene. In the "content donor" section, acknowledge the source of the scene and the coordinates.
When a script loads coordinates from their own site, you first have to upload the pdb file (including proper attribution). Then, load the coordinates into the SAT of the new page, and run the state script after commenting out the load statement. This process was used to remix the beta-hairpin folding morph (first example next to the 3D window).
Remixing 3D scenes from Proteopedia
Finding the script
Let's say you want to reuse a 3D scene you found on an existing Proteopedia page. To remix the 3D scene, you need to know the name of the underlying state script. Again you can go into the edit tab of your source page, and look for 'scene' tags. They will contain the path to the script (in a format like '77/778334/A_chain/1', giving a pair of internal numbers, the scene name and version number).
If you are looking at the scene already, you can also get the script from the Jmol console (this way, you can make sure you have the correct scene):
- . Click on the green link
- . Right click in the Jmol window
- . Open a Jmol console if it is not open already
- . Show the history
- . Go from the bottom of the history to the closest line (often 4 lines up, above "set refreshing true") that contains a script (URL contains "/wiki/scripts"). Note down the name and number of the script, along with the name of the page.
These steps are shown graphically in this diagram. At this point, you should add the URL of the scene to your Content Donor section. You should attribute the page (there is no obligation to find the specific author among the source page's multiple authors).
Loading the script into the SAT
Then, go to the scene authoring tool (SAT) of your new page, and load the scene (by entering the source page name, and selecting scene and version number). Modify it if you need, add a caption, and save it under a name that makes sense in the new context. Some scenes do not appear in the SAT under the page name you expect. If you get stuck, look at the source of the script (e.g. 77/778334/A_chain/1 is at proteopedia.org/wiki/scripts/77/778334/A_chain/1.spt). On the line that starts with "# documentBase", you will find the page where the script originated after the string "title=". Using this page name in the SAT, you should be able to load the scene, modify it, and save it for your new page.
Using the scene as is
If you don't want to modify the scene at all (no new caption, no new orientation, no new transition options), you could also add it by pasting a scene block directly into the text, e.g.<scene name='77/778334/A_chain/1'>green link text</scene>The disadvantage is that it becomes harder to remix for others, who have to do some extra steps (described in the section above) to find the originating page.
Remixing scenes from Proteopedia as images
The quickest way to save a 2D image from a 3D scene is to take a screenshot, but it is not the best. To get more control over image size, and to capture the information necessary to go back to a 3D scene, open the Jmol console to issue this command:
write IMAGE width height PNGJ n "fileName"
In this command, "width" and "height" are the size of the image in pixels, and "n" is an integer between 0 and 10 indicating the degree of compression to reduce the file size. The filename should have a .png extension to indicate the image format.
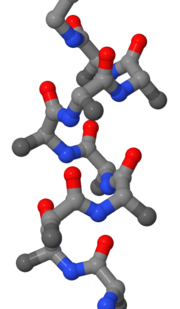
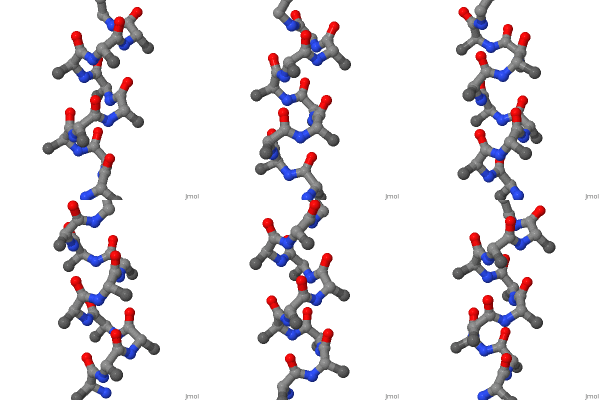
If you want a 3D effect, saving as an animated GIF works for many types of media (slides, web pages). In Proteopedia, the 3D Jmol windows have an animation link on the bottom. Click on this and follow instructions to make a rotating or rocking animated GIF from the 3D scene. The following animated GIF was made from the alpha helix scene shown below. To learn about the parameters used, click on the image.
Examples of 3D scenes that were remixed
| |||||||||||
Content donors
- The alpha helix scene is from the alpha helix page (based on script ).
- The is from ChemTube3D, https://www.chemtube3d.com/proteinhairpin/, by Nick Greeves and his students.


